What these tools actually do
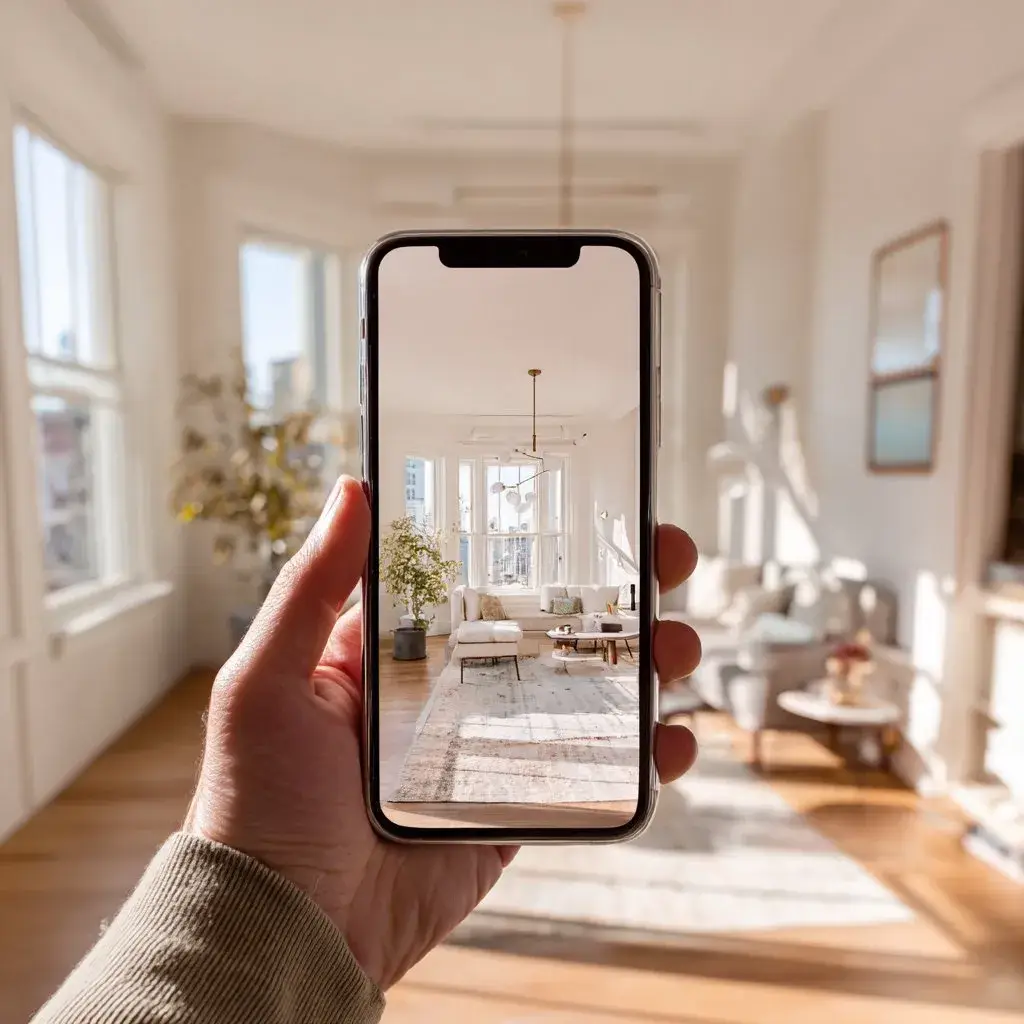
AI room visualisation tools work from a photo you upload of your real room and generate a new version of it — with your requested changes applied. The room is recognisably yours. The changes are visualised as they would actually look in your specific space, with your light, your proportions, and your existing constraints.
This is different from looking at someone else's styled room on Pinterest. Pinterest tells you what a style looks like. Visualisation tools tell you what that style looks like in your room.
Faster, cheaper decision-making. You test before you commit. You see before you spend.
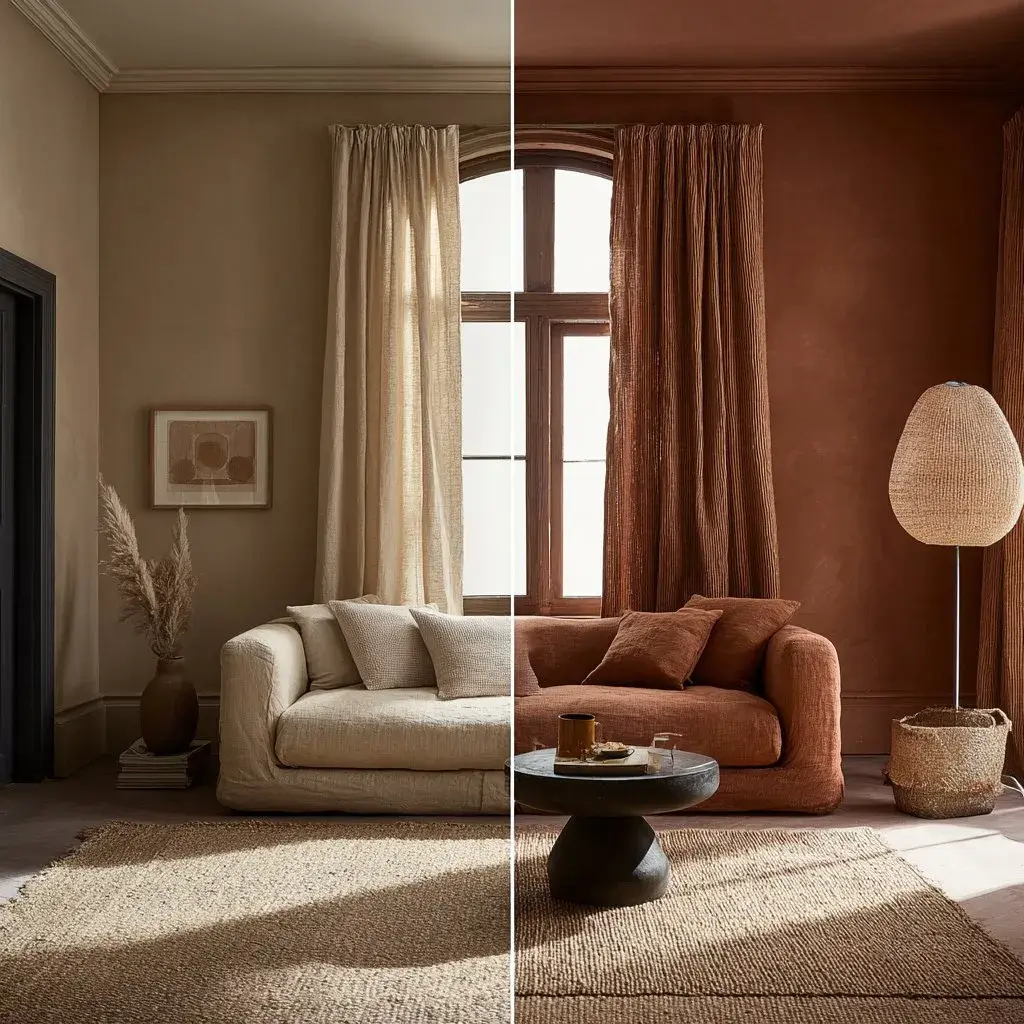
The same room. The left is the starting point — the right is the AI render after a single prompt. No guessing. No committing. Just seeing.
How to take a photo that works
The quality of your result depends significantly on the quality of your input photo. The AI is changing your specific room — so give it your actual room, not the version you're hoping for.
- Stand in the doorway or entrance
- Shoot straight ahead, not from an angle
- Capture as much of the room as possible
- Natural daylight gives the best results
- Avoid shooting directly into a bright window
- Avoid flash — it flattens the room
- Upload the room exactly as it is
- Don't tidy or stage it
- Imperfection is fine — authenticity is what matters
- Dark or shadowy corners
- Extreme wide-angle or fisheye lenses
- Shooting directly into bright windows
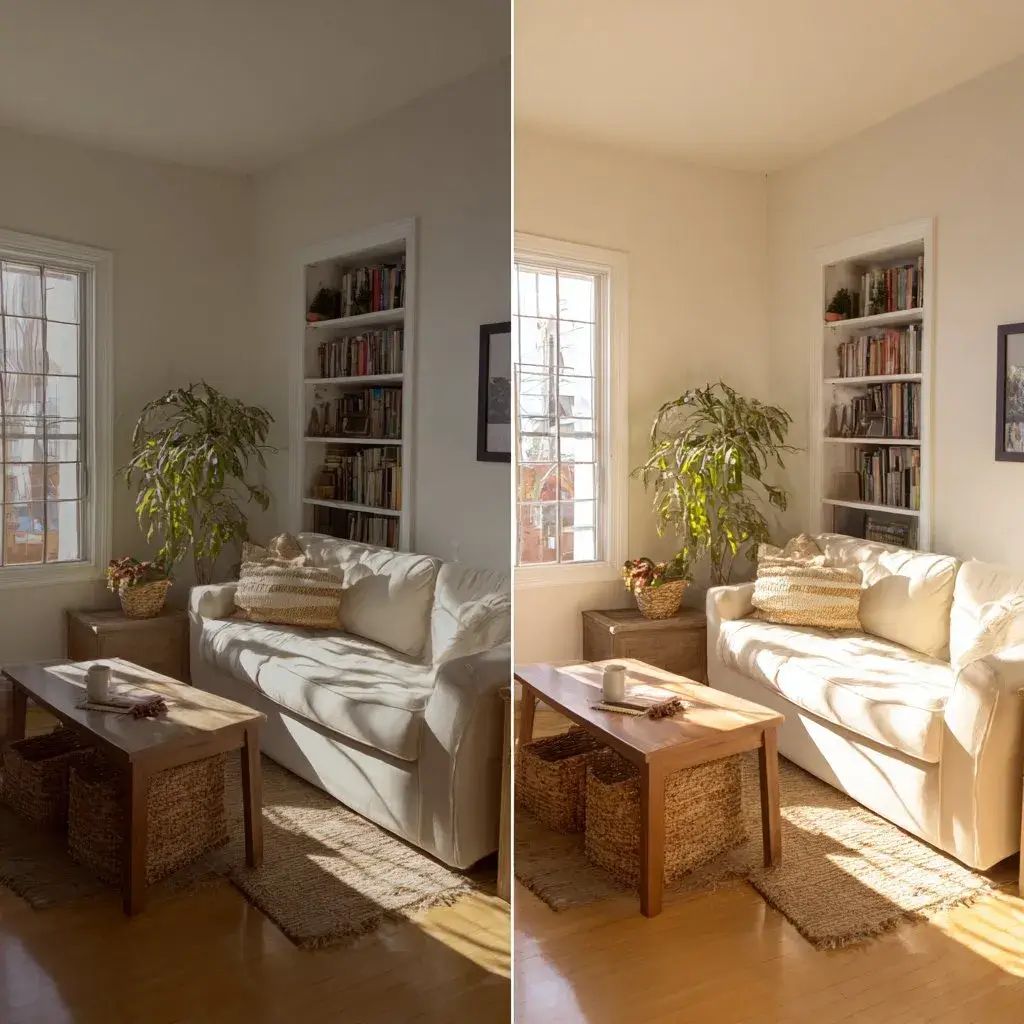
Same room. Same furniture. The only difference is the light — and it changes everything about what the AI has to work with.
The prompt formula
The difference between a useful render and a confusing one almost always comes down to how the prompt is written. Good prompts follow a simple three-part structure.
The most common mistake: asking for too much at once. One or two changes per prompt produces a far more useful result than a full redesign in a single step.
Which tools to try
Several AI tools can visualise your room from a photo. They differ in how they handle room structure, prompt precision, and the realism of the output. Here are three worth starting with — all free or freemium.
No tool gets it right every time. Generate two or three versions of the same prompt and compare. The best result is rarely the first one.
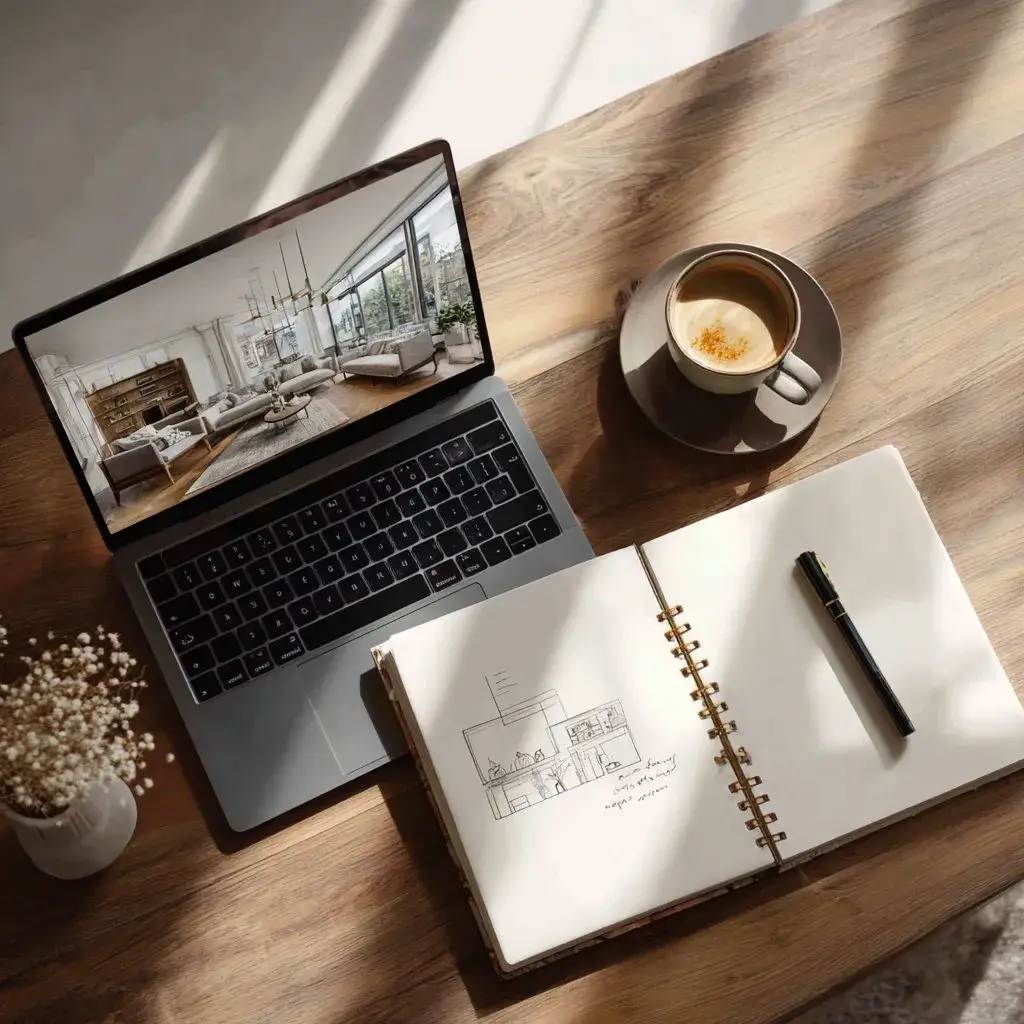
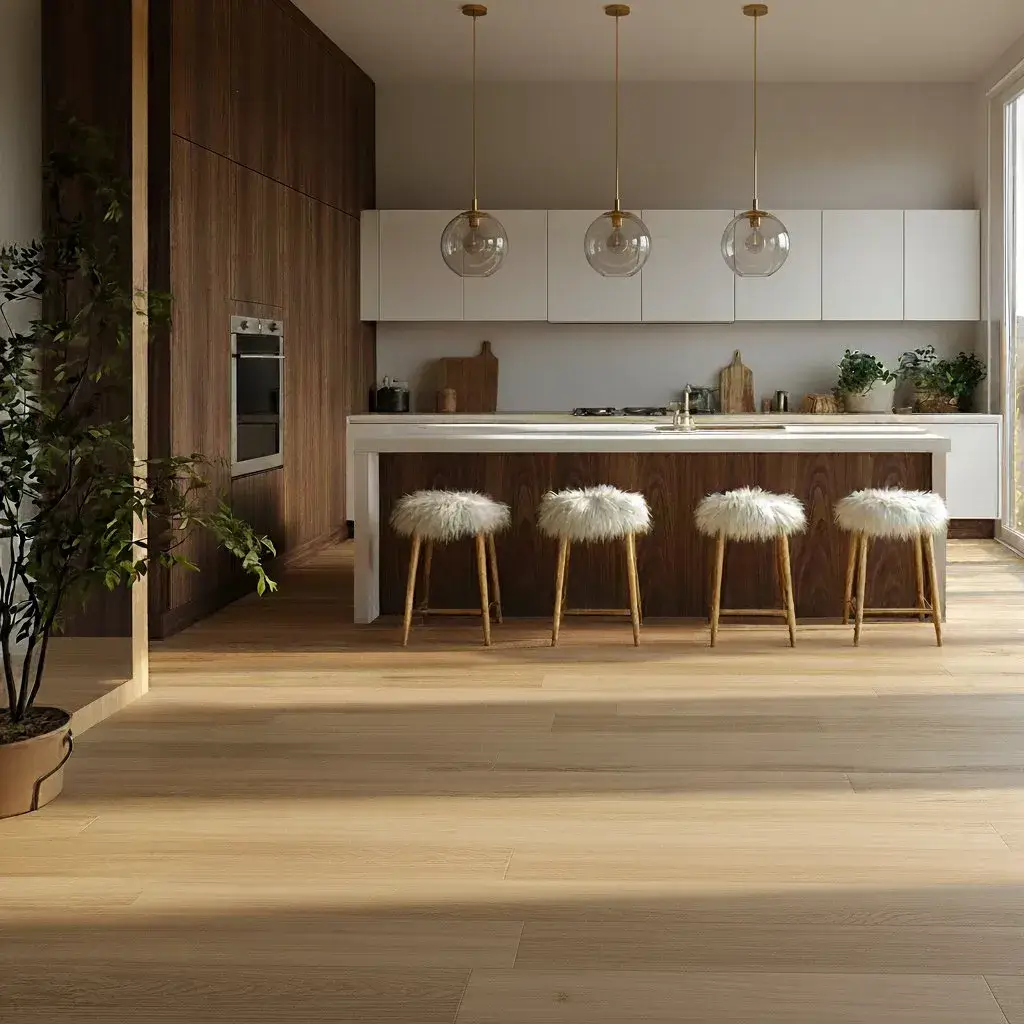
The full workflow on one desk. A room photo in, a render out — with space to sketch your own variations.
Common mistakes to avoid
Most failed renders come from the same handful of avoidable mistakes. Fix these and your results improve immediately.
- Asking for too much at onceA prompt that requests six changes produces a muddy, inconsistent result. One or two changes per prompt. Build up.
- Not specifying what to keepIf you don't tell the AI what stays, it will change everything — including things you liked. Always lead with what should remain identical.
- Using dark or blurry photosThe AI needs to read your room. If it can't see the corners, it can't render them well.
- Expecting exact product matchesAI visualisation shows you the *look* — not the SKU. Use the render as a style guide, then find the real product separately.
Your room doesn't need to be clean. It needs to be honest.
What to do with your results
A good render is not the end of the process. It's the beginning of a much more confident decision-making process.
Save your favourites
Most tools let you download or save versions. Save the ones that feel closest to what you want — even if they're not perfect.
Compare side by side
Put your current room photo next to the render. The gap between them tells you exactly what needs to change — and whether the change is worth it.
Create a shopping list
From the render, extract the specific elements that make it work: wall colour, rug style, lamp shape, art size. Use this as your brief when you shop.

From render to reality. The image becomes your shopping brief.